Dynamic Host Configuration Protocol (DHCP) is a client/server protocol where a DHCP server automatically provides an Internet Protocol (IP) address and other related information such as subnet mask, default gateway and DNS to DHCP clients. DHCP server and client use UDP port 67 and 68 for communication. In a network, a DHCP client (IP devices such as Desktop, Laptop, Smartphone etc.) requests for an IP lease to DHCP servers and a DHCP server responses allocating IP address and other related IP information for a certain period. So, a DHCP server reduces huge network administration tasks of a system administrator. Every MikroTik Router has a built-in DHCP service. So, system admin can easily turn MikroTik Router into a DHCP server and can easily reduce his network administration task.
MikroTik DHCP Server configuration
Generally, every MikroTik router has a built-in DHCP service. So, if you have a MikroTik router and you want to enable a DHCP server in your network with MikroTik router to reduce your administrator task, keep reading the rest of this article where I will show you how to configure a DHCP server in your MikroTik router.
Before going to start configuring a DHCP server in MikroTik router, I will show you a basic network diagram where a MikroTik router is working as a DHCP server as well as it is working as a network gateway. I hope, your network is almost same like the below network diagram and you want to enable a DHCP server in your MikroTik router.

DHCP Enabled Network Diagram with MikroTik Router
In the above network diagram, the first interface (ether1 port) of MikroTik router is connected to an ISP for accessing internet and this interface is known as WAN port. All the LAN users are connected to second interface (ether2 port) of MikroTik router through a network switch. We will now enable DHCP server in this second interface so that all the LAN users will get network information (IP, Subnet mask, Gateway and DNS) dynamically from this DHCP server to access internet. But before enabling DHCP server in MikroTik router, you have to complete MikroTik router basic configuration that you find in our link here: How To Configure A MikroTik Router Step By Step. Basic configuration includes WAN and LAN IP assigning, Gateway IP assigning, DNS configuration and NAT rule creation.
Now complete the basic configuration of your MikroTik router and then follow my below steps to enable DHCP server in your MikroTik router.
- Go to IP > DHCP Server menu from your winbox. DHCP Server window will appear.
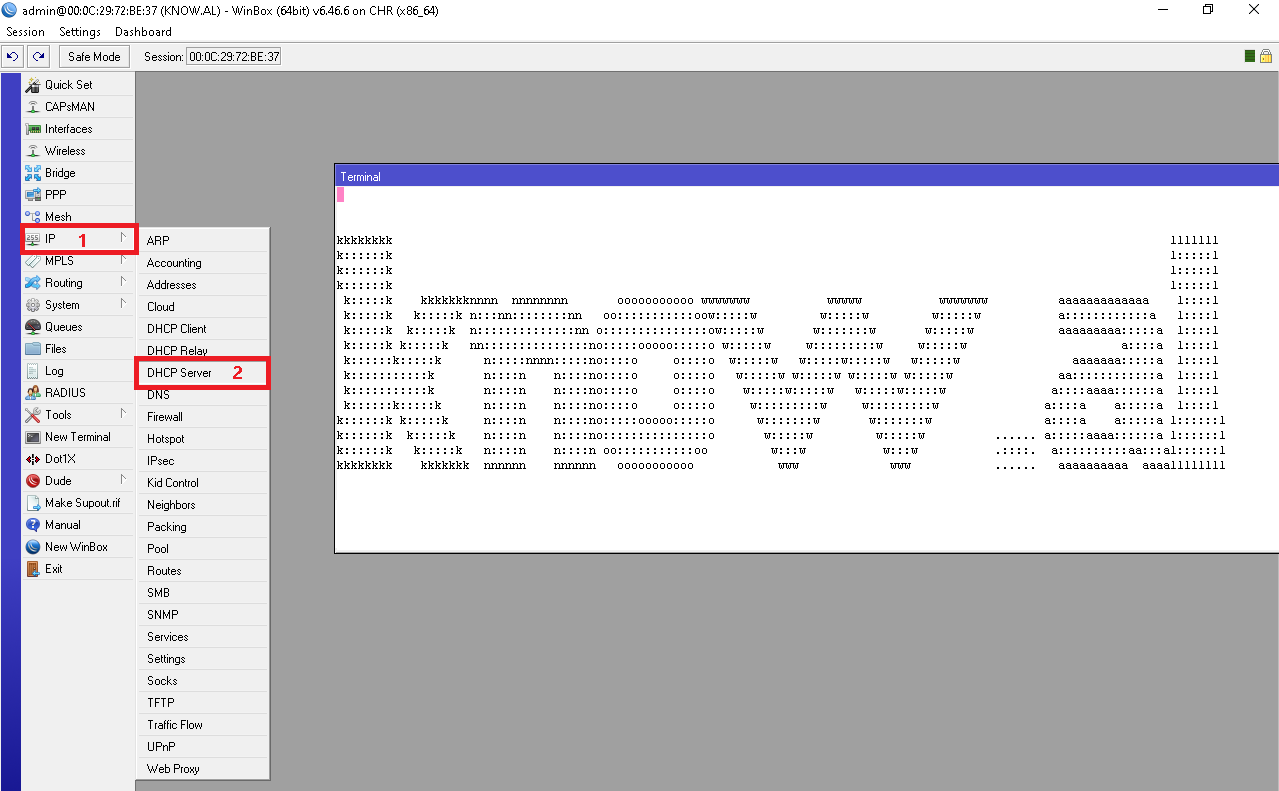
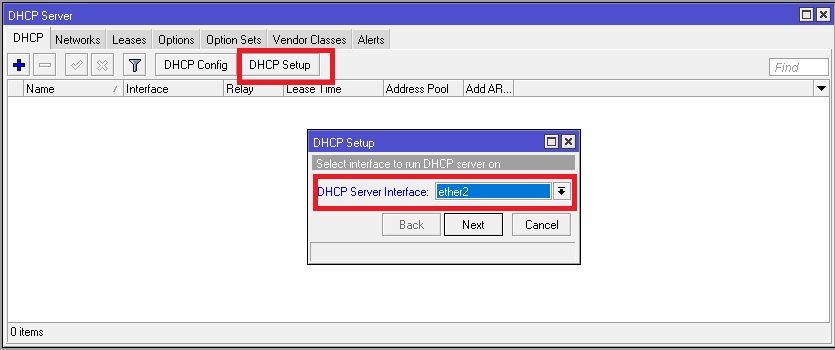
- In DHCP Server window, click on DHCP Setup button and choose the interface (in this article: ether2) in which you want to setup DHCP server from DHCP Server Interface drop-down menu and then click on Next
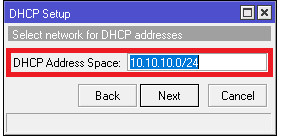
- Now put your LAN network block in DHCP Address Space input box and click Next DHCP client/LAN user will get IP from this network.
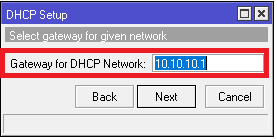
- Choose gateway address for the given network in Gateway for DHCP Network input box and then click Next
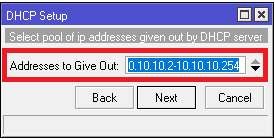
- Provide IP range from which your DHCP client/LAN user will get IP in Address to Give Out input box and click Next
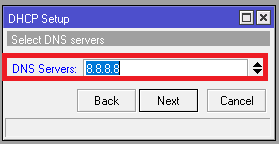
- Provide preferred DNS server IP and click Next
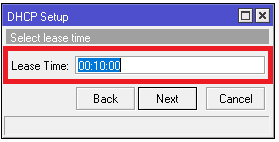
- Now provide IP lease time and click Next Default lease time is 3 days.
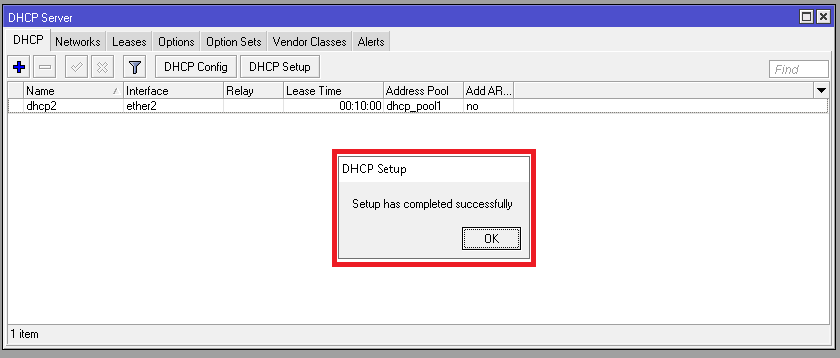
- DHCP setup is complete now and a successful message will be shown.
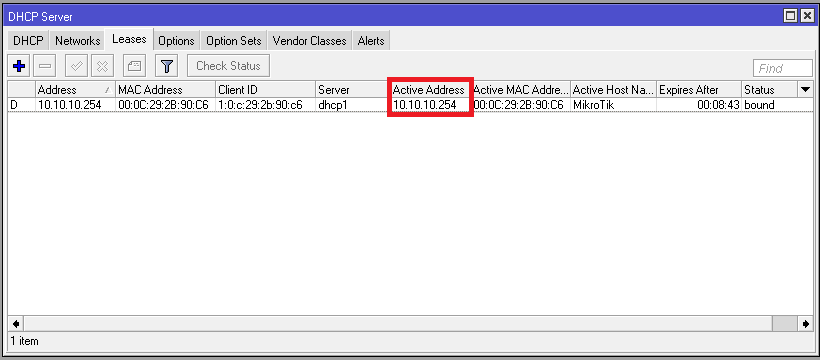
- Now connect any IP device (Desktop, Laptop, Smartphone etc.) to your network. Automatically an IP will be allocated for that device from your MikroTik DHCP server. Click Leases tab and observe IP lease status of that DHCP client.
If you follow the above steps carefully, your MikroTik router will turn into a DHCP server and your LAN users will now be able to obtain IP information from your MikroTik DHCP server.